Monthly Archives: July 2011

Building a Bird

IMG_0867

Yesterday, having gotten both wings pretty much together, I had to decide whether to keep adding details to them or to go on to figuring out the body. I knew that going on to the overall structure was the right next step but I just didn’t feel like it. I went ahead and started on it by making shapes for the body and the head but got frustrated. It was hard. And it was a beautiful day outside. And I didn’t want to be inside. And I was cranky.

So I gave myself permission to take a day off. I spent a lovely afternoon in my garden reading and smelling the heliotrope. Aaah, just what Dr. Cameron ordered.

This morning I was able to come back and start over with a fresh mind and new perspective. And instead of being frustrating it was a fun and challenging puzzle to figure out.

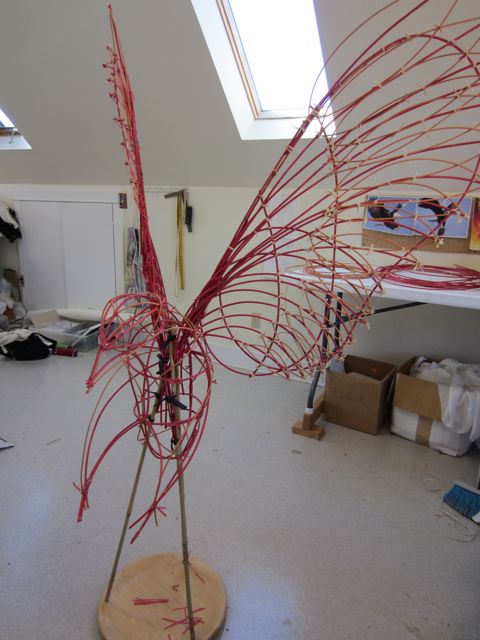
I started with the basic shapes I had made the day before and joined them together to make the head, neck and body. It took some time because it was all about getting the proportions right. I didn’t want to make a mistake at this point and have to spend a lot of time later going back and fixing it.

Once I got those shapes together I made the base. I made a tripod out of bamboo poles and fixed them into a heavy, round, wooden platter I found at Value Village (along with some fabulous red platform boots!). I drilled out divots for the poles to sit in and tacked them with hot glue. So far, so good. The time spent doing the drawings and the macquette really paid off. It all went together pretty much the way I had planned and the proportions are all working.

At this point I realized I needed to reorganize the space in my studio–this thing was getting big! My big table space is made up of two tables side by side and covered with laminate. So I moved everything to the side and now have a big(ish) space in the middle of the room.

The biggest challenge continues to be making it in a way that it can be taken apart for transport and reassembled once I get to Burning Man. After today, I think the body with tail won’t be fixed onto the base until we get there. Otherwise it will be too hard to get the wings attached. Any way I do it it’s going to be a little tricky but should be much easier with a second (or third) set of hands than it was bracing and tieing it myself today.

I got as far as framing out the legs and adding some form on the legs, chest and bill. Next is working on the tail. It’s looking a little lopsided at the moment. But basically I’m really happy with the way it’s turning out.
IMG_0870

Taking Wing

IMG_0846

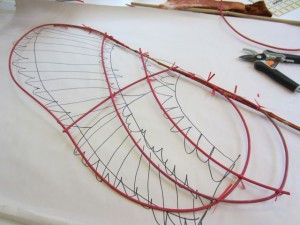
Yesterday, after drawing and reading about bird wings and feathers and tails, I decided it was finally time to stop preparing and just start on this Fire Bird project. There’s only so much planning you can do before it becomes a way to avoid getting started. Not to say that research isn’t valuable, but after a point it can become procrastination. The questions I still had needed to be answered with my hands on the materials.

framework over full size drawing

framework over full size drawing

So I started.

It was a little rough figuring out working with the reed but I feel like I’m getting the hang of it. I started with the wings because they are basically two dimensional. Once I finish them I should know the material well enough to move into the three dimensional body. One of the trickier issues is that I want to make it in parts and do the final assembly once I arrive to make it easier to transport.

But that’s in the future. For now, I’m happy with the way the wings are coming along.

two days work, two wings

two days work, two wings

Hatching Plans

IMG_0694

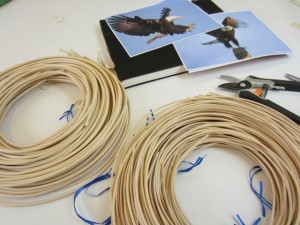
IMG_0684I’ve been incubating plans for the Fire Bird for Burning Man (and trying out as many bird puns as I can in here in the blog). I’m going to make it using bent reed which is a new material for me. I’ve used it a little bit to make lanterns, which is basically what the Fire Bird will be, minus the skin of paper. I have friends that have worked with it pretty extensively, Sarah Lovett has made some quite large scale kinetic sculptures for the Solstice Parade and my friend Nicole has shown me how she uses it to make luminaries. So I’m not quite flying without a net but definitely figuring it out as I go.
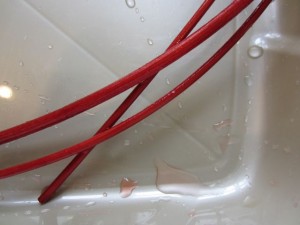
IMG_0689First step was a trip to NW Cane Supply, just North of 80th on 15th NW, where I picked up some #7 and #5 round reed and had an amusing chat with the guy who works there. Next step was to test dyeing the reed. I followed the really simple instructions in the Dharma Trading Co. catalog and it dyed up beautifully.

Yesterday I came up with a drawing I liked but felt I needed a maquette to figure out the scale and determine the amount of materials. I don’t want to start dyeing the reed until I know how about how much I’ll need. So today I made a maquette out of really basic materials: pipe cleaners and bamboo skewers. It helped to get my hands on some three-dimensional materials. I can only go so far with drawing, everything starts to make more sense once I start moving it into three-dimensions.

I’m feeling much more confident about the project now. There’s still a lot to learn and I’m very much flying (!) by the seat of my pants but it seems to be the way I always work. I wouldn’t go buy reed and learn how to use it unless I had a project it was going toward. And it’s pretty low pressure gig, I am going to burn it when it’s finished, after all.

IMG_0692

And now . . .

I’ve just gotten confirmation that I’m going to be doing an installation in Center Camp at Burning Man. This year’s theme is Rites of Passage. I’m excited about it because it’s another try for me to find a way to bring my art to Burning Man. The festival is near and dear to me but it’s just not a soft and squishy fiber art kinda place. I’m hoping that the structure of Center Camp will create a more protected space and also a place to focus on smaller installations.

I’ll be using the 150-foot-long piece of silk I dyed for BM a few years ago. I’m going to drape it like a valance across a 12 foot pole that spans the entrance to an alcove formed where the shade cloth comes down to the ground. I’ll be making a Fire Bird, or Phoenix, effigy out of rattan, paper, and perhaps some fabric. People will be able to add remembrances and stories of transformation to the effigy over the course of the week. Saturday night after the Man burns, we will take down the fabric, unwind it from its pole, and process with the fabric and effigy to the remains of the Man fire. There we will cast it into the flames and the Phoenix will be consumed by the fire.

Or something like that.

Yew Are Here

IMG_0680

We just got home from Veneta, Oregon last night around 9pm. It was a long day packing up and traveling home from the Oregon Country Fair. It was a lovely year, no rain, no heat, no major traffic jams. Just a good time with friends and family, seeing shows, eating at Tofu Palace, wandering the paths and listening to and playing music.

This was our fourth year of creating Yew Are Here, a living room space where people can relax amid beautiful surroundings, day or night. It was gratifying because it feels as if people finally know where we are and appreciate and look for the space. I was really glad that I pushed myself to make the new Tower Lanterns. They really pulled the space together. It feels cohesive now and even more inviting.

The Fair is very, very different from a fine art environment. People interact with things, even get inside the lanterns. I had not one but two couples comment while I was there that the Towers would make really good enclosures for their outdoor showers for their RVs. Yeah, great except for the poles running through the center of them. One couple even asked me, “How much?” I told them $1500 and, funny, they didn’t pursue it.

I really enjoy the work I do for festivals but it’s not the work I make for the gallery. The Fair is good family time. And that’s okay.

the kids got to ride in a new kind of back seat while setting up

the kids got to ride in a new kind of back seat while setting up

IMG_0668IMG_0669

the Arctic Tern puppets flying above the path

the Arctic Tern puppets flying above the path

Washed Up

IMG_0400

It’s at this time, when faced with 18 yards of waxy silk, that I wonder “What was I thinking?”

The wash out is always a chore. The soy wax washes out completely in hot water and soap which is much better than the old days of ironing out wax between newspaper and never getting the residue out without dry cleaning. But it takes a lot of work, a lot of hot water, and makes a mess.

And I was very unhappy to find that the biggest panels didn’t turn out the way I had hoped. I was looking for spirals of warm yellows and orange on a background of rich reds. It turns out my waxed spiral designs with their expressive brush strokes didn’t hold up to the dye and all I got were yellow splotches. Bummer.

IMG_0588

So I redid the spirals with much bolder wax lines and overdyed with darker reds. The fabric actually turned out really well, but I hadn’t budgeted time for that extra step. So I have been humping the last few days to get it done. Sewing my little fingers off while my hubbie did all the gathering, packing, and errand running for the rest of the installation. And tonight we got them done in time to finish the rest of the packing before we hit the road for Oregon tomorrow.

I think they turned out pretty well.

IMG_0630

I’m Dyeing, Already!

IMG_0394

Next layer is dyeing. I used the dyes in a thin solution and, because I’m doing a direct application, I used urea in the chemical water along with my fix mix of soda ash buffered with baking soda. I used two different blues on the Water fabric but three dyes each on the Sun and the Earth. I used big brushes and it goes pretty fast but it’s a workout moving all that fabric around. This is where it would be nice to have a bigger studio where I could lay out three yards of fabric at a time. Oh well, I’ve figured out ways to do it over the years and I make it work.

IMG_0395IMG_0398

Wax On

IMG_0390

The next step is waxing designs onto the silks. This is the fun part. It’s like drawing with wax. It’s also a little nerve wracking because it’s pretty final. You can wash out the wax but it takes a lot of work and, in this case, there’s no time. So spirals, leaves, and waves then on to the next layer of dye.

IMG_0387

New Lanterns

IMG_0381

I’ve been working on a new project for my installation at the Oregon County Fair. Each year we take our hippie selves out of the closet and go down to Veneta, Oregon to take part in the Fair. This will be the fourth year that we’ve created a “Living Room” called Yew Are Here. It’s a non-commercial open space where people can rest and regroup before hitting the next show, getting some food, or checking out the next craft booth. For me, it’s a chance to show my art in an environment I really love.

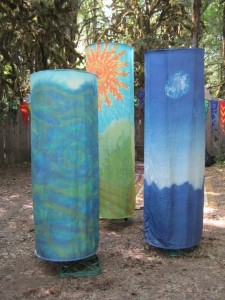
002The Tower Lanterns I’ve been using as the centerpiece of the space have been getting a bit worn and frayed, especially after the big rainstorm of 2009. I either needed to spend some time rehabbing them or make something new of this year. So, of course, I decided to make something new! The old lanterns were pictoral and showed the Sun/Earth, the Moon/Mountains, and the Sea. I decided to keep these basic themes but work in a more graphic style using overall patterning, color and texture which is more closely related to the fine art work I do.
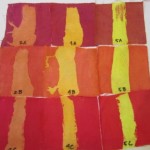
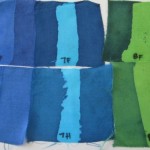
IMG_0380The patterns and colorways are as follows:
Largest/Sun: spiral patterns with colorway of yellow and orange with overdye of reds

IMG_0379Medium/Water: waves patterns with colorway of greens and light blue with overdye of darker blues
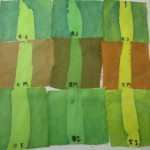
IMG_0378Smallest/Earth: vines and leaf pattern with colorway of greens with overdye of darker greens and brown

First things first, though. I made a bunch of test swatches (top) to test out layering colors and then determined which combos worked well. Of course, since I can’t seem to help myself I ended up using thirteen different base colors, thirteen different overdyes, and doing it on both silk and cotton. I didn’t do all the combinations (it was tempting but that would have been 338 samples) but I still did one hundred fourteen.

At the bottom are the silks with the first layer of dye and dyed cotton muslins for linings. They need linings because otherwise the lights shine right through the silk.Next step, wax.

IMG_0385