Author Archives: Cameron

Easelstan 5 @ 10 Artist Statement

IMG_1741

Easelstan Studio and my relationships with the other artists there has had a huge impact on the development of my artwork. The space is like a blank canvas, ready to reflect back what I put into it. My studio-mates sustain me, providing honest feedback and encouragement to take risks.

My work is informed by surface design on fabric. I begin with white natural fiber cloth which is dyed, overdyed, discharged, resisted, printed. Form and stitch are equally essential elements in the final artwork. Each piece in Easelstan 5 @ 10 represents a transition in my work over the last decade.

The earliest work here, postCARDS: 52 weeks, 52 cards, was created in 2006. The postcard quilts are sketches on a theme, each composition an amalgam of materials, techniques, and experiences. The playing cards provide rich inspiration for design and color as well as the structure for the series, a full deck in 52 weeks. The small format encourages experimentation with surface design and quilting techniques, and is also a yearlong journal in images and words traveling through the mail both away from and back to me.
IMG_1743

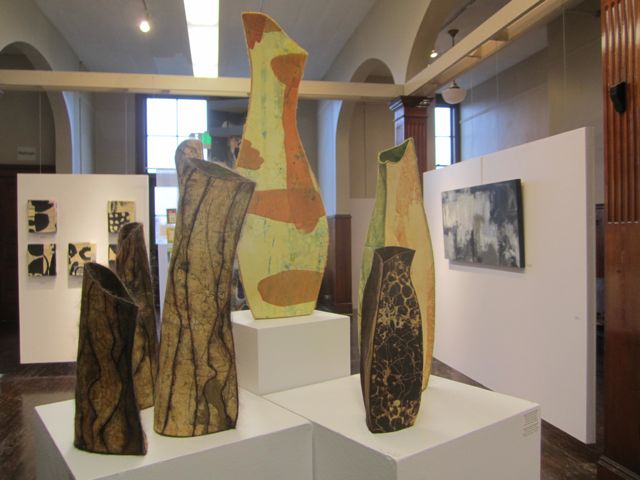
Epithelium, Coral Vessel, and Discharge Vessel, 2008, show my deepening explorations into surface design: Binding, stripping away, and rebuilding. The pieces, pushing into three dimensions, are some of the first I constructed using  sculptural techniques I developed. Organic shapes suggest the natural world and become forms with a cultural meaning.

Earth Forms, 2009, and Artifacts, 2010 are from a body of work inspired by the landscape that surrounds us and the touch of human hands upon it. Each form is a document of the passage of time. The Earth Forms are a direct response to my experience of nature. The Artifacts interpret natural forms and textures through the lens of culture.

Can I Help You? is part of a larger installation, The Act of Becoming, from 2009. The figure is used to explore that which is seen and that which is kept close to the skin. The Waitress, the Mother, the Lover: all of these roles play a part in a woman’s life, fragmentary and coexisting.

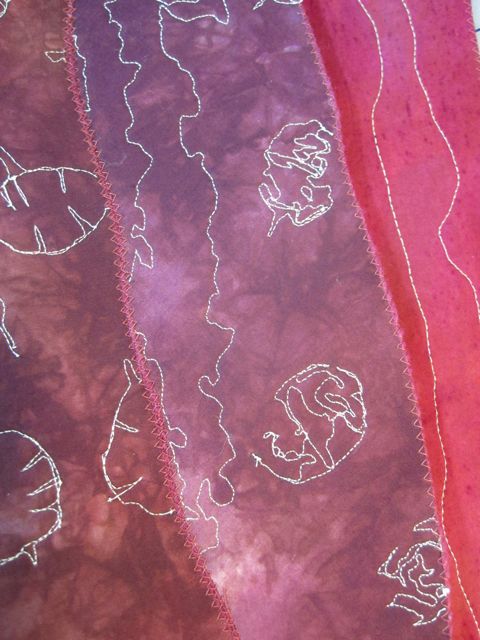
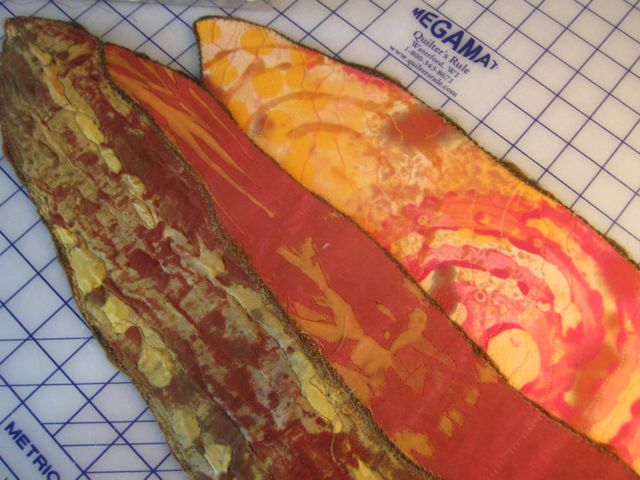
The newest work, Grasses, extrapolates on the idea of the quilt. It is a beginning, featuring the print on fabric as a stand alone element and emphasizing it with stitch. Grasses shows my continuing interest in natural forms and textures contextualized through our agrarian past. We can focus on a single blade of grass in the expanse of a field for just a moment before it is lost among the many. The cycles of sowing and reaping sustain us as we work in balance with the Earth.

Each work in this show is a snapshot of my development as an artist, from the refining of my craft to the leap from two dimensions into three. So much of our work as artists is mundane, putting in the hours at the studio so that we are there, ready, when inspiration strikes. Easelstan has provided a place where Anna, Paul, Pam, Anne, and I can do that work. We come together in our daily meditations and experimentations, learn from each other, and share our trials and successes. When Anne moved to Los Angeles this Fall it was a loss to our small community. We miss her greatly, but working together on this anniversary show has brought the four of us closer. Looking into the past gives us a chance to reflect and reassess our work, ready for the next ten years.
IMG_1746

10 Years and Counting

artwork all boxed up and ready to go

artwork all boxed up and ready to go

I delivered the art for Easelstan 5 @ 10 today to the Phinney Neighborhood Center Gallery. The show is celebrating our studio’s tenth anniversary. Anna and Paul converted an empty and unloved house into artist’s studios in 2001. I’ve been at the studio about eight years, more or less. Pam and Anne moved in about three years ago.

Pam, Paul, and I met with the art coordinator at Phinney this morning to come up with a layout for the show. After some art tetris we found spots for everything and I think it will be an interesting show. I’m looking forward to seeing it all hung and seeing how our art works together and the connections between pieces. Anne sent her pieces through the mail from her new home in Los Angeles much like I sent my postcards through the mail to the studio. The postcards also echo the grids that Paul uses in his work.

I realized that although Anna, Paul, and I have all been in many group shows, we’ve never been in one together. Working on this show has brought us all closer and I think cemented us as a group. Anna helped me with framing. Anna, Paul, and I helped Pam with pricing. Pam and I helped Anna pick out the art to show. Paul took the group photo which Pam made into the fabulous postcard. I still miss Anne, but am excited for her as she has recently found a new and dynamic studio space in LA.

It’s been an interesting process to look back at my work over time and see the progression. All the pieces in the show mark transitions in my work. I chose them to work together visually, but also tell a story of my art journey as I have deepened my practice and found my voice. And now on to the next 10 years.

setting up the show

setting up the show

And More Blades

IMG_1705

I spent Saturday at the studio picking out the fabrics for the next set of Blades. I need a lot of time to sort it, unfold it, look at it with other fabric, move it around, and fold it up again. I was able to make initial fabric choices for the other six Blades which feels like a big accomplishment. Today I did a little more dyeing, hopefully the last I’ll need to do for these pieces.

Here are some of the combinations of fabrics I looked at. Do you have a favorite?

IMG_1695IMG_1696IMG_1697

And the Next Step

IMG_1678

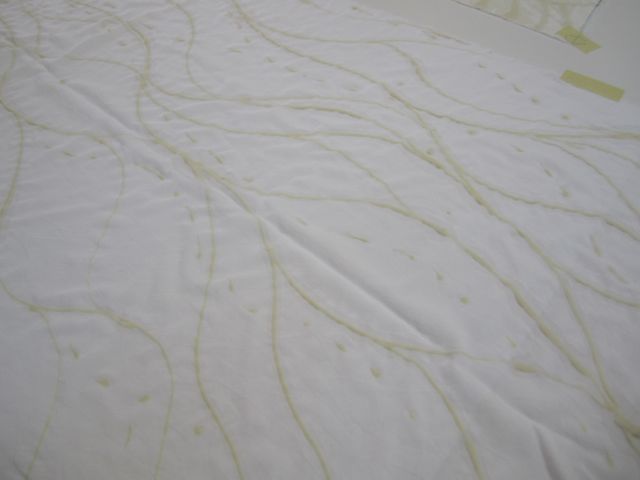
Color. After the flour paste resist lines that were inspired by my beach walk dried, I went over the fabrics with thickened dyes. Here you can see them after they’ve been batched and washed out. But are they finished? No! Too bright a contrast where the resist was and the fabric stayed white.

IMG_1682

It’s been a difficult week. My youngest has had a bad cold and a high fever. The fever is down finally and now she’s in the kvetchy,  miserable stage. Needless to say, Mom hasn’t been able to get to her work and is feeling a bit stressed.

I was able to grab a couple of hours at the studio today and did some speed dyeing. I overdyed these pieces along with seven others and dyed three white pieces of fabric. Twelve pieces all together! Of course, I only used four colors, but still it was good therapy and at least I can feel like I’m moving forward.

IMG_1684

speed dyeing results

A Change of Scenery

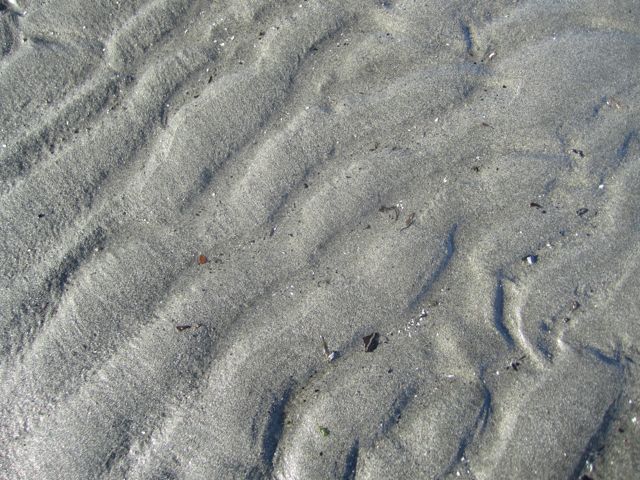
an eroded piling at Golden Gardens

At the end of last week I had a blank canvas experience. I’m starting the next set of Blades and ready to start choosing fabrics. But when I went through my fabrics for this series I realized that I didn’t have enough fabric to choose from. All of a sudden I felt like a deer in the headlights and I couldn’t think of what to do next. It didn’t help that I was getting over a cold. So what to do when the well runs dry?

Answer: Go outside! Saturday the sun came out, a rare occurrence in Seattle in January. I dragged my husband and oldest daughter along with me for a walk on the beach. Just getting out next to the Sound jogged some inspiration loose. Lines and patterns in nature, what I like best!

IMG_1642IMG_1649

After the beach, I went to the studio and used flour paste to make patterns on the cloth. Next step, dye.

IMG_1674IMG_1672

Beauty in the Kitchen

IMG_1636

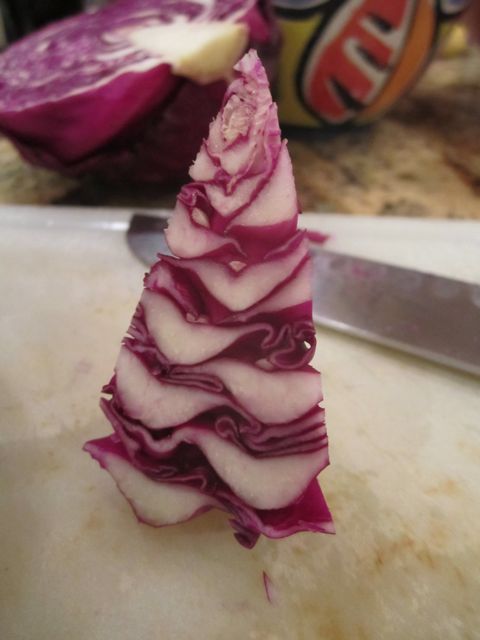
The other night I made red cabbage with pork chops for dinner. Wow! What a gorgeous vegetable. The color, the lines, that perfect little triangle of the cut out core blew my mind. So I had to get out my camera and document it. Then  I chopped it up and cooked it. Beautiful, a little suggestive in these photos, and delicious, too.

IMG_1635

Postcards

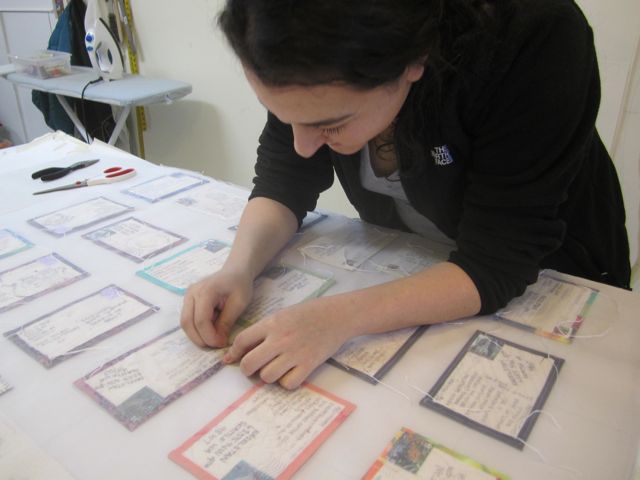
Talia sewing the postcards to the organza

Talia sewing the postcards to the organza

Our Easelstan group show at the Phinney Neighborhood Center is fast approaching. I’m going to be showing a mixture of old and new pieces. One piece I knew I wanted to show was the postcard series I did in 2006. Each week of the year I made a mixed media 4 x 6 inch postcard including a playing card and mailed it to the studio. At the end of the year, 52 weeks, I had made a full deck of 52 cards. One reason I love this series are that it gave me a chance to try a lot of different techniques and media in a small size. It also became a journal of a very intense and busy year during which we remodeled our house. A lot of those weeks when we were out of our house and trying to keep up with remodel decision making, it was all I could do to make a small piece of art and get it in the mail. It was good to have a commitment to myself during those busy times. And I know that Anna and Paul enjoyed getting the cards each week in the mail. All the cards arrived, some a little tattered and with missing postage, and I’ve often wondered what the mailman thought about my project.

I’ve shown them a couple times and it’s a challenge to figure out how to show 52 small pieces. For the Phinney show the studio mates and I decided to hang them in a way that people could see the back of the cards as well as the front. I stitched them (with help from my new intern, Talia) to a piece of silk organza that I’m hanging from a bamboo pole. It works great! Come on by the Phinney Neighborhood Center between February 2-25th, 2011 and see them for yourself. Better yet, come on February 11th for the Artist’s Reception and say “Hello.”

IMG_1656

all 52 cards, front

IMG_1657

and back

Satisfaction

IMG_1618

There’s nothing more satisfying than getting something finished. Last night I finished the seventh piece for the April Foster/White show. Even though there is much more work to be done (another 15 pieces hopefully) I feel like I can take a deep breath. I’ll be delivering these seven on Saturday and I want to share these photos of the interiors of them before I do.

At the top is Blade One: Lunaria. You see the interior of the front and the exterior of the back panel of the piece. I really liked the contrast of the light thread against the darker background as I worked on the front and decided to use it on the back, too. On the exterior front of the piece the stitching is a very subtle white on white, but not here.

In Blade Five I used a piece of silk that I had printed in a Jane Dunnewold workshop about three years ago. It was pretty big, about 50 inches and I had never really liked it. It was too busy and the imagery never fit with my work. But the colors worked with the exterior of this piece and here it adds a sense of whimsy. You could never tell, except through these photos, that such a wild piece of fabric is hidden inside this piece.

outside front panels and interior back panel of Blade Five

exterior front panels and interior back panel of Blade Five

interior front and exterior back panel of Blade Five

interior front and exterior back panel of Blade Five

This last one here is Blade Eleven. Again, a piece of fabric that been kicking around for a number of years. It was a piece of cotton I had discharged, a little too wild for use by itself. I used part of the fabric on one of the front panels, covering it with a layer of silk crepe to tone it down and add color and texture. I used the rest of it on the three inside panels. It’s whimsical all right! I love the way the stitching contrasts with the pattern on the fabric.

interior panels of Blade Eleven

interior panels of Blade Eleven

Blade Eleven

Blade Eleven

The Final Steps

IMG_1556I’ve been working, working, working and sewing, sewing, sewing to finish some pieces for the April show. I’m taking three pieces off the photographer today and should have seven pieces finished by the end of the day tomorrow! Then it will be right back at it, no rest for the weary, although I am going to fit in a pedicure somehow.

IMG_1559This is Blade #4 in its final stages of construction. In the top photo the panels are ready for stitching and I’m auditioning thread colors on my work table.This photo shows the inside of the piece before I sew it together. I like to take photos of the inside of the panels after they are stitched but before I sew the panels together. I like that there is this secret, unseen part of the piece and try to keep it at the same level of craftsmanship as the outside. I think of the idea of the beauty of our secret inner selves that shines through our skin.

And below is the finished piece and a couple of detail shots. The fabrics are a hand-stitched shibori piece I did earlier this year, (there’s a blog post about making it from February 1st, 2010) and a really nice piece of silk broadcloth that I used maple leaves to print then overdyed a couple times to tone down the red. I’m happy with the piece, it’s dark but rich and I like the shape. It’s good to see these take their final shapes, to see them come together after being in pieces for so long. And it’s a relief to get them finished!

IMG_1572IMG_1577IMG_1575

Gifts

IMG_1552

the scarf sewn into a tube

the scarf sewn into a tube

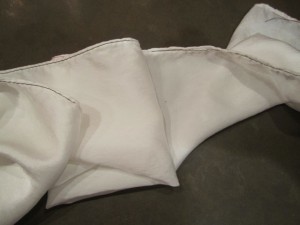
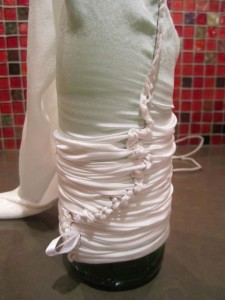
‘Tis the season to whip up some gifts for friends. I’ve been dyeing some quick and easy shibori scarves for my gal pals. Too bad more of you guys don’t wear silk scarves! I used the 12 mm “Silk Satin” from Dharma Trading. The eleven inch scarves are just the right size to wrap around wine bottles. I sew along the hem on the sewing machine (use the longest stitch you have) to make a tube and slide them on to the bottles.

IMG_1539It can be a tight fit depending on the size of the bottle. Wearing rubber gloves helps to add traction when getting the tubes onto the bottles. Wetting the fabric helps it to compress as tightly as possible to get the best line definition.
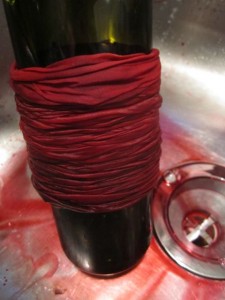
Once they’re on the bottles I dye them by spooning dye mixed with Fix Mix (one part soda ash, three parts baking soda). You can apply as many colors of dye as you want. I like to use a mixed dye color.

maroon and rust orange spooned onto the scarf

maroon and rust orange dyes

Some dyes will give you really interesting shadowing and multiple colors because the chemicals set at different rates during the batching process. I got great results with Havana Brown from Prochem and Avocado from Dharma.  Pure dye color will still give you a striated texture but you won’t get the color variation that you get from a mixed color.

I wrapped the bottles in plastic newspaper bags and batched them in a tucked away spot next to a heat vent overnight. The next morning I rinsed them in cold water still on the bottles, then slipped them off and into the washer with some synthrapol. After they were dry I took out the stitching. That was actually the most time consuming part of the process, or maybe it just seemed that way! Once the stitching was out I wet and dryed them once more to take out the crease, pressed them and starting giving them away to oohs and aahs. They make lovely gifts and it’s such a simple process it seems like cheating.

warm out of the dryer

warm out of the dryer