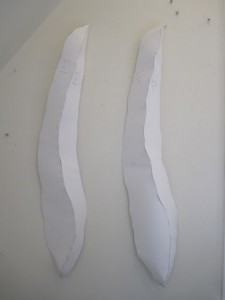
Category Archives: Work in Progress

And the Next Step

IMG_1678

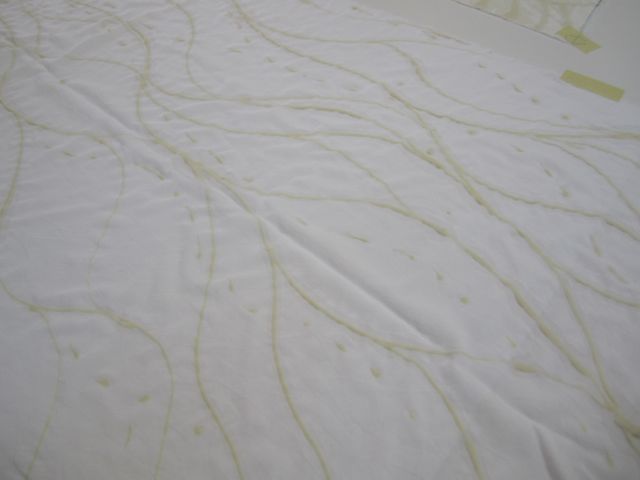
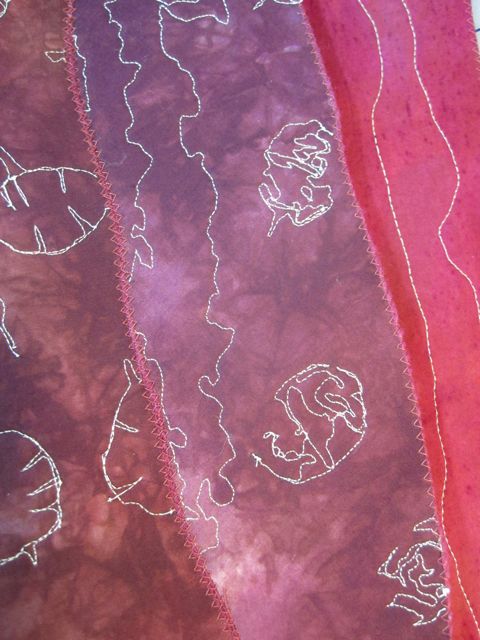
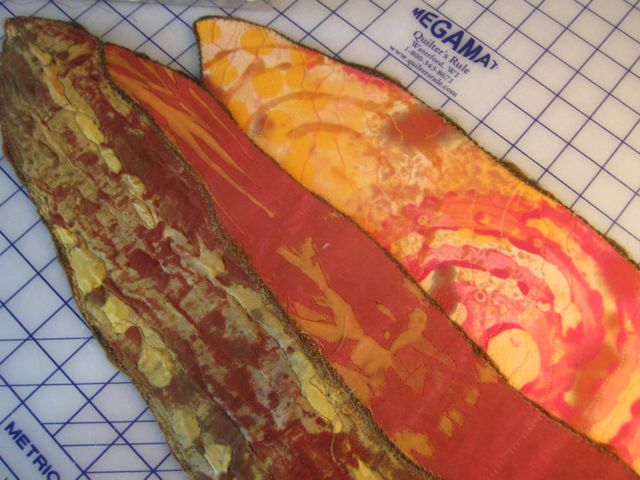
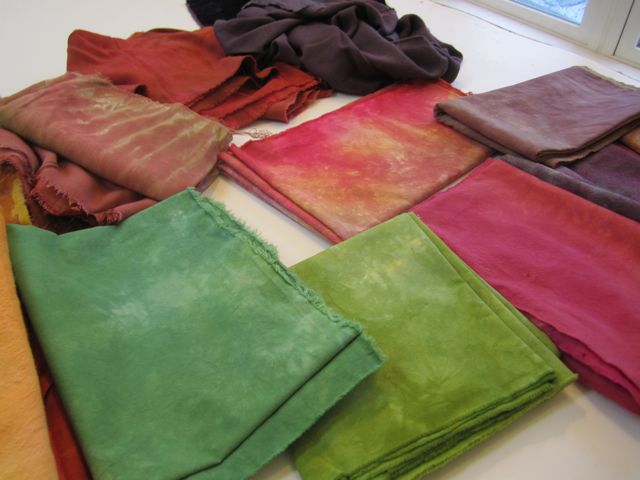
Color. After the flour paste resist lines that were inspired by my beach walk dried, I went over the fabrics with thickened dyes. Here you can see them after they’ve been batched and washed out. But are they finished? No! Too bright a contrast where the resist was and the fabric stayed white.

IMG_1682

It’s been a difficult week. My youngest has had a bad cold and a high fever. The fever is down finally and now she’s in the kvetchy,  miserable stage. Needless to say, Mom hasn’t been able to get to her work and is feeling a bit stressed.

I was able to grab a couple of hours at the studio today and did some speed dyeing. I overdyed these pieces along with seven others and dyed three white pieces of fabric. Twelve pieces all together! Of course, I only used four colors, but still it was good therapy and at least I can feel like I’m moving forward.

IMG_1684

speed dyeing results

A Change of Scenery

an eroded piling at Golden Gardens

At the end of last week I had a blank canvas experience. I’m starting the next set of Blades and ready to start choosing fabrics. But when I went through my fabrics for this series I realized that I didn’t have enough fabric to choose from. All of a sudden I felt like a deer in the headlights and I couldn’t think of what to do next. It didn’t help that I was getting over a cold. So what to do when the well runs dry?

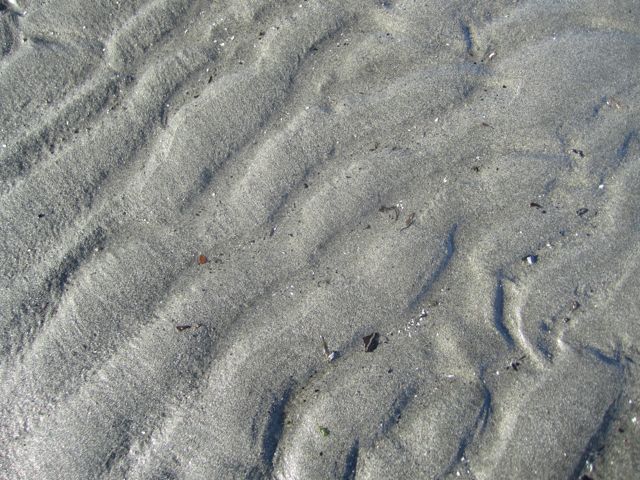
Answer: Go outside! Saturday the sun came out, a rare occurrence in Seattle in January. I dragged my husband and oldest daughter along with me for a walk on the beach. Just getting out next to the Sound jogged some inspiration loose. Lines and patterns in nature, what I like best!

IMG_1642IMG_1649

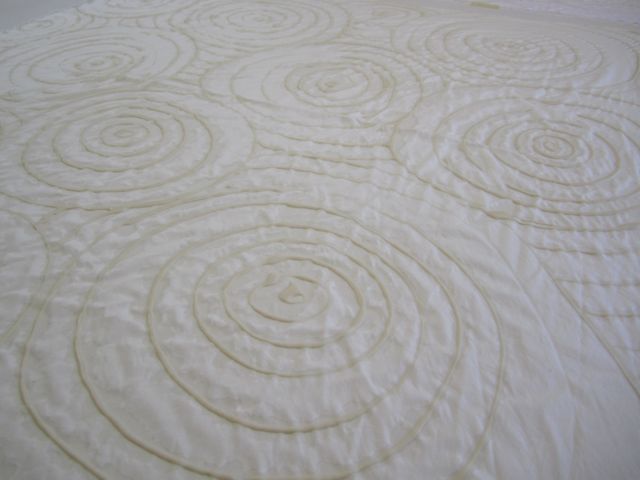
After the beach, I went to the studio and used flour paste to make patterns on the cloth. Next step, dye.

IMG_1674IMG_1672

Satisfaction

IMG_1618

There’s nothing more satisfying than getting something finished. Last night I finished the seventh piece for the April Foster/White show. Even though there is much more work to be done (another 15 pieces hopefully) I feel like I can take a deep breath. I’ll be delivering these seven on Saturday and I want to share these photos of the interiors of them before I do.

At the top is Blade One: Lunaria. You see the interior of the front and the exterior of the back panel of the piece. I really liked the contrast of the light thread against the darker background as I worked on the front and decided to use it on the back, too. On the exterior front of the piece the stitching is a very subtle white on white, but not here.

In Blade Five I used a piece of silk that I had printed in a Jane Dunnewold workshop about three years ago. It was pretty big, about 50 inches and I had never really liked it. It was too busy and the imagery never fit with my work. But the colors worked with the exterior of this piece and here it adds a sense of whimsy. You could never tell, except through these photos, that such a wild piece of fabric is hidden inside this piece.

outside front panels and interior back panel of Blade Five

exterior front panels and interior back panel of Blade Five

interior front and exterior back panel of Blade Five

interior front and exterior back panel of Blade Five

This last one here is Blade Eleven. Again, a piece of fabric that been kicking around for a number of years. It was a piece of cotton I had discharged, a little too wild for use by itself. I used part of the fabric on one of the front panels, covering it with a layer of silk crepe to tone it down and add color and texture. I used the rest of it on the three inside panels. It’s whimsical all right! I love the way the stitching contrasts with the pattern on the fabric.

interior panels of Blade Eleven

interior panels of Blade Eleven

Blade Eleven

Blade Eleven

The Final Steps

IMG_1556I’ve been working, working, working and sewing, sewing, sewing to finish some pieces for the April show. I’m taking three pieces off the photographer today and should have seven pieces finished by the end of the day tomorrow! Then it will be right back at it, no rest for the weary, although I am going to fit in a pedicure somehow.

IMG_1559This is Blade #4 in its final stages of construction. In the top photo the panels are ready for stitching and I’m auditioning thread colors on my work table.This photo shows the inside of the piece before I sew it together. I like to take photos of the inside of the panels after they are stitched but before I sew the panels together. I like that there is this secret, unseen part of the piece and try to keep it at the same level of craftsmanship as the outside. I think of the idea of the beauty of our secret inner selves that shines through our skin.

And below is the finished piece and a couple of detail shots. The fabrics are a hand-stitched shibori piece I did earlier this year, (there’s a blog post about making it from February 1st, 2010) and a really nice piece of silk broadcloth that I used maple leaves to print then overdyed a couple times to tone down the red. I’m happy with the piece, it’s dark but rich and I like the shape. It’s good to see these take their final shapes, to see them come together after being in pieces for so long. And it’s a relief to get them finished!

IMG_1572IMG_1577IMG_1575

Gifts

IMG_1552

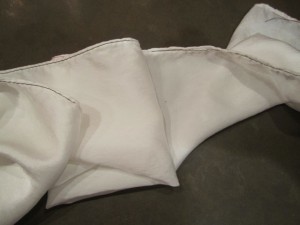
the scarf sewn into a tube

the scarf sewn into a tube

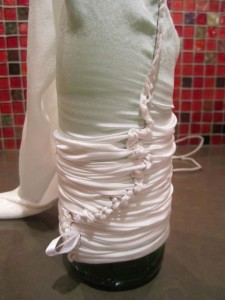
‘Tis the season to whip up some gifts for friends. I’ve been dyeing some quick and easy shibori scarves for my gal pals. Too bad more of you guys don’t wear silk scarves! I used the 12 mm “Silk Satin” from Dharma Trading. The eleven inch scarves are just the right size to wrap around wine bottles. I sew along the hem on the sewing machine (use the longest stitch you have) to make a tube and slide them on to the bottles.

IMG_1539It can be a tight fit depending on the size of the bottle. Wearing rubber gloves helps to add traction when getting the tubes onto the bottles. Wetting the fabric helps it to compress as tightly as possible to get the best line definition.
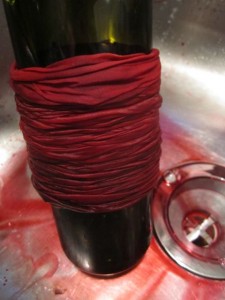
Once they’re on the bottles I dye them by spooning dye mixed with Fix Mix (one part soda ash, three parts baking soda). You can apply as many colors of dye as you want. I like to use a mixed dye color.

maroon and rust orange spooned onto the scarf

maroon and rust orange dyes

Some dyes will give you really interesting shadowing and multiple colors because the chemicals set at different rates during the batching process. I got great results with Havana Brown from Prochem and Avocado from Dharma.  Pure dye color will still give you a striated texture but you won’t get the color variation that you get from a mixed color.

I wrapped the bottles in plastic newspaper bags and batched them in a tucked away spot next to a heat vent overnight. The next morning I rinsed them in cold water still on the bottles, then slipped them off and into the washer with some synthrapol. After they were dry I took out the stitching. That was actually the most time consuming part of the process, or maybe it just seemed that way! Once the stitching was out I wet and dryed them once more to take out the crease, pressed them and starting giving them away to oohs and aahs. They make lovely gifts and it’s such a simple process it seems like cheating.

warm out of the dryer

warm out of the dryer

Making Progress

final fabrics for the Blades

final fabrics for the Blades

The Blades series is coming along. I was starting to feel panicked because I didn’t have a good handle on when the artwork for my upcoming shows was due. I’m making new work for the Phinney show in February as well as the Foster/White show in April. Plus, I’m teaching workshops at Pratt in February and April. Add in soccer games, chorus concerts, and all the other demands of motherhood, and I was really starting to freak out about how I was ever going to get it all done.

So I sat myself down in front of the calendar and planned out my schedule with all my deadlines plus a week by week work plan. For some artistic types it would be over the top, but for me it gives me a sense of calm. I now know exactly where I am with my work, and if no one gets sick, I haven’t vastly underestimated how long each step will take me, and I don’t take any vacations, I should be able to get it all done by mid-March.

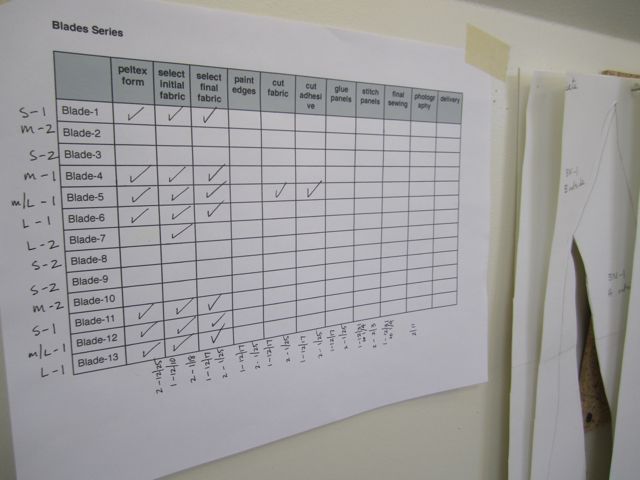
And if that wasn’t enough planning, I also made a table of all the steps I still need to complete for the Blades. It’s complicated working on thirteen pieces at the same time! Plus, it’s just so satisfying to check things off. As of today I have made final fabric selections for the first group seven Blades and cut out the fabric and adhesive for Number Five. My plan is to be done with cutting, painting, and glueing up the panels for the first group by the end of this week. Next week I’ll move on to sewing while the kids are off school. Wish me luck!

look at all those check marks!

look at all those check marks!

getting ready for painting

getting ready for painting

framing areas for cutting

framing areas for cutting

and now for color . . .

IMG_1425

overdyeing the stash

overdyeing the stash

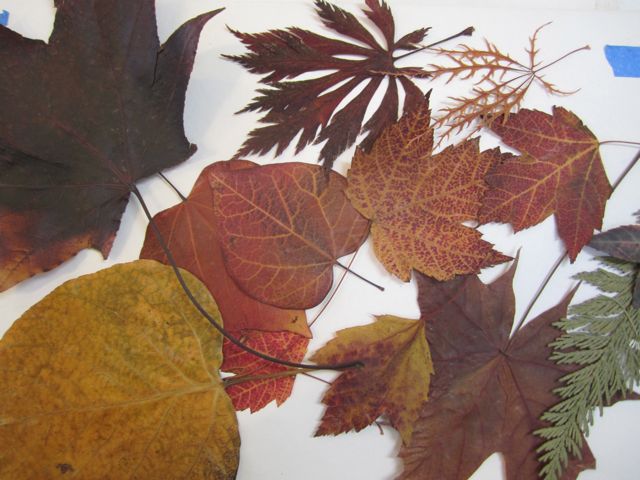
I found these leaves I had collected and dried a couple of years ago at my house when I was cleaning up the other day. Perfect timing for thinking about color. I started out by digging deep into my stash, reconsidering all those pieces of fabric that haven’t been used for one reason or another. I’ve been dying and over-dyeing, applying resists and discharge. It’s been great fun. The colors are evolving, looking not only at my leaves but also at the Bark book. Every page is another inspiration.

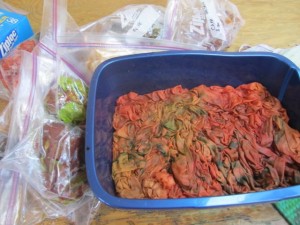
I mixed up six dyes (chartreuse, rosewood, celery, burnt orange (my new favorite color), palomino, and mustard) and used them to dye or overdye about twenty pieces of cloth. I’ve also been using oatmeal and flour paste resist. Really soon now it’s going to be time to stop generating fabrics and start choosing them for pieces. But for right now, I’m kind of drunk on color!

IMG_1430

dyes

contemplating the stash

contemplating the stash

oatmeal, yum!

oatmeal, it's not just for breakfast!

Blades–the Final Cut

IMG_1374_2

IMG_1365

number four before and after

I’ve got all thirteen of the Blades series ready to go on to the next step now. I was able to put them up all together for the first time two weeks ago. Seeing them together made me realize that I still needed to do some adjustments on the shapes. Right around number eight the shapes shifted in a way I liked. I needed to make some changes on the first seven to have them all work together. Some of the changes were pretty subtle, like number four here that just needed to have some more organic curves added to it’s edges. Number five needed the most work, here’s a before and after shot.

before

before

after

after

Now that they are all fixed up in paper, it’s time to move on to surface and color. First stop is my stash to see what I’ve already got. I expect to spend the next couple weeks in the dye studio developing new fabric for the series. I’ve yet to really develop a color theme, I’d like to add some purples along with the reds, browns, and ochers I’ve been working with in the last year or so.

I’ve planned to work on the series in two parts in order to have some variation in what I do each day and also to get some pieces completely finished early for photography. We’ll have to see how that works, I already feel a little nervous about it. When I start feeling anxious about the work I have to remember that this happens with every project. I have to just keep putting one foot in front of the other and not get overwhelmed by the whole project. Yeah, right.

Testing One, Two, Three

IMG_1272I’ve been doing some testing for my dye book. I realized that the longer I work with dyes, the more sophisticated my testing has become. Some of the work I did five years ago is incomplete. So along with the tap tests I did earlier this month, I decided to update my dye book with discharge effects. I went back through my samples and found the original test fabrics I did (because I don’t throw away anything!) and was able to use them to do the samples. I got a new discharge agent from ProChem called DeColourant. It’s citrus based and is supposed to be less toxic than bleach or thiourea dioxide. It comes in both a spray and paste so of course I ordered both.
So my discharge tests became very involved, five different discharge agents: bleach, soft scrub with bleach, thiourea dioxide, paste DeColourant, and spray DeColourant. I tried all five on cotton and rayon, and the three without chlorine on habotai and raw silk as well. And all of this with 43 different dye colors. Can you say obsessive?

So now I have lots and lots of little piles of little 1.5 inch squares of fabric with different discharge effects. I haven’t had a chance to compare them all because I don’t want to get them mixed up. In general, my observations are that soft scrub takes away more color than plain bleach and that the DeColourant doesn’t work that well. Now I just have to find time to paste the samples in my book so I can really see them. Oh the glamorous life of the fiber artiste!

13 Blades

IMG_1263

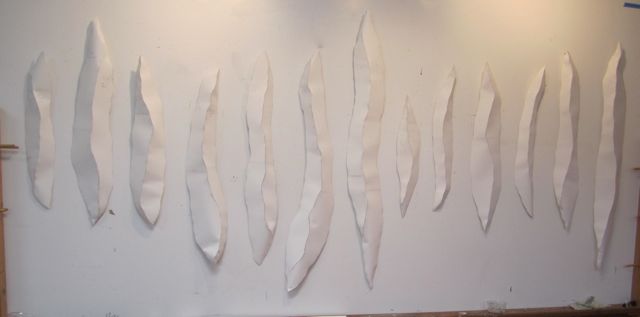
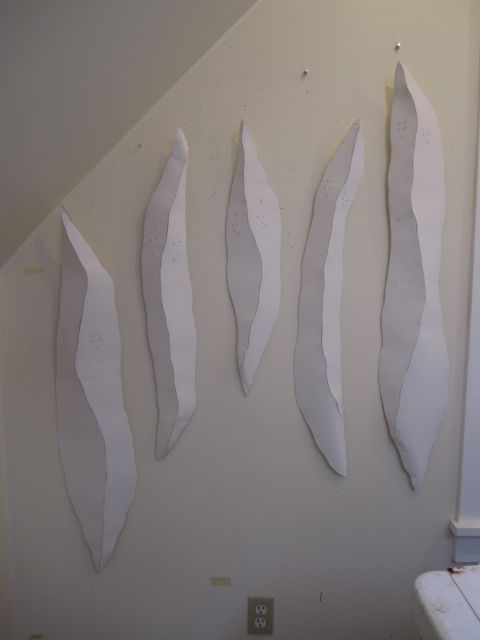
I’ve never worked on such a big series at one time before. I now have 13 of the blades worked out in paper. When I got to ten, I realized I needed to get a better sense of their sizes, especially because I don’t have a space in my studio I can put them all up together. I made a list of all the approximate dimensions, divided them into small, medium, and large sizes and decided to make one more of each. It feels like an odd way to make art, but right now I’m not really visualizing these completely as individual pieces but as part of an installation. I’m excited by these crazy shapes.

Pam, my studio-mate, is out of town this week and offered to let me use her studio which has a nice big wall. I put them all up on Tuesday and learned what I really already knew, that I needed to rework the first seven pieces. Also, this is a big body of work! I’ve been reworking the pieces with the goal of having them all worked out in paper by the end of this week. Luckily, it’s taking a lot less time to rework the pieces than to come up with them from scratch. I want to finish the last two today, then put them all up on the wall again. Hopefully, they won’t need anything beyond some fine tweaking.

Next week is Thanksgiving and my youngest daughter doesn’t have school all week. I’m planning to use that time to get started on to the next step: cutting out the patterns in peltex and hand-stitching them together to make sure they work before I move into fabric. I started thinking about that yesterday, just how am I going to sew these together? Ah, but that’s next week’s challenge. This week is paper!

IMG_1270